 Peter Founder
After Installing This, I Closed My PropellerAds Dashboard
PropellerAds MCP
Hi, I’m Peter.
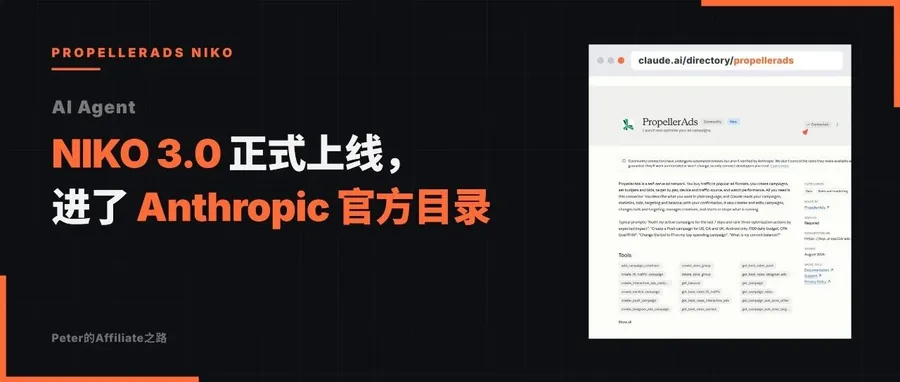
When I wrote about NIKO last time, I mentioned that they had also recently released an official MCP Connector, that it deserved its own post, and that I’d write one.
This is that post. And it’s not a rehash of the official docs: I plugged this thing into my own Agent last month and have had it running since, and I’ve already written up a full 7-day review.
Here I’ve pulled together the parts most useful to readers: what it is, how I installed it, and the few things I most want to warn you about after a week of use.
01 What MCP is
In one sentence: one .mcpb file + one API token.
The AI Agent you already use can then read and write the PropellerAds backend directly: create, stop and edit campaigns.
It covers every format (Push, Popunder, Tg Ads, Interactive, Paid Social); full targeting from GEO down to browser filters; pulling stats, adjusting bids, checking your balance.
NIKO: the platform’s built-in copilot, ready out of the box, and you chat with it inside the PA dashboard.
MCP: the steering wheel goes to your own Agent, which can plug into your own workflow.
An analogy: NIKO is a driver the platform assigns you; MCP is being handed the car keys.
One more important point: this is a connector built by PropellerAds themselves, running on the official SSP API v5. It’s not a third-party reverse-engineered tool.
02 How I installed it (10 minutes)
Step 1, get a token: dashboard → Personal Information → API Access, generate it and copy it.
Note one prerequisite: your account needs $100 in ad spend before you can apply to activate API access. If you’ve just signed up, run some volume first.
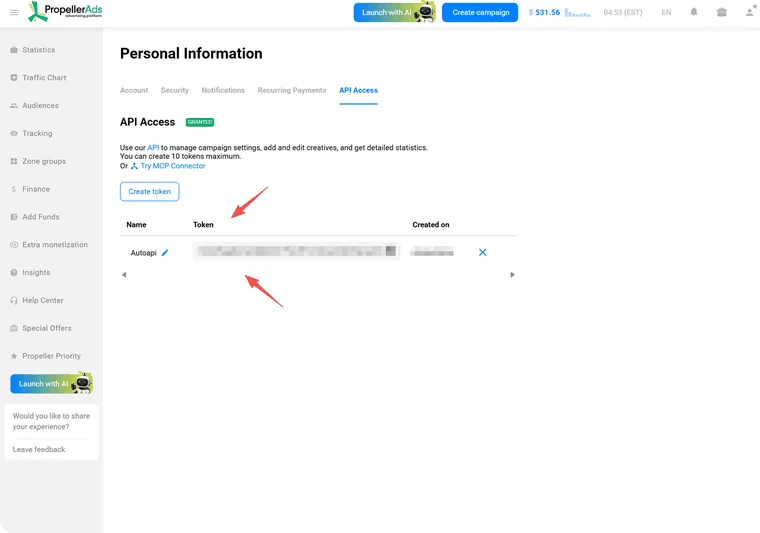
Personal Information → API Access, generate and copy your own token
Step 2, download the connector: find Launch with AI at the top of your account, open the chat and you’ll see Try MCP Connector. Download propellerads-adv-mcp.mcpb (about 2.6MB).
It’s a standalone package with its own runtime: no Node to install, no Docker, no compiling. Download it and use it.
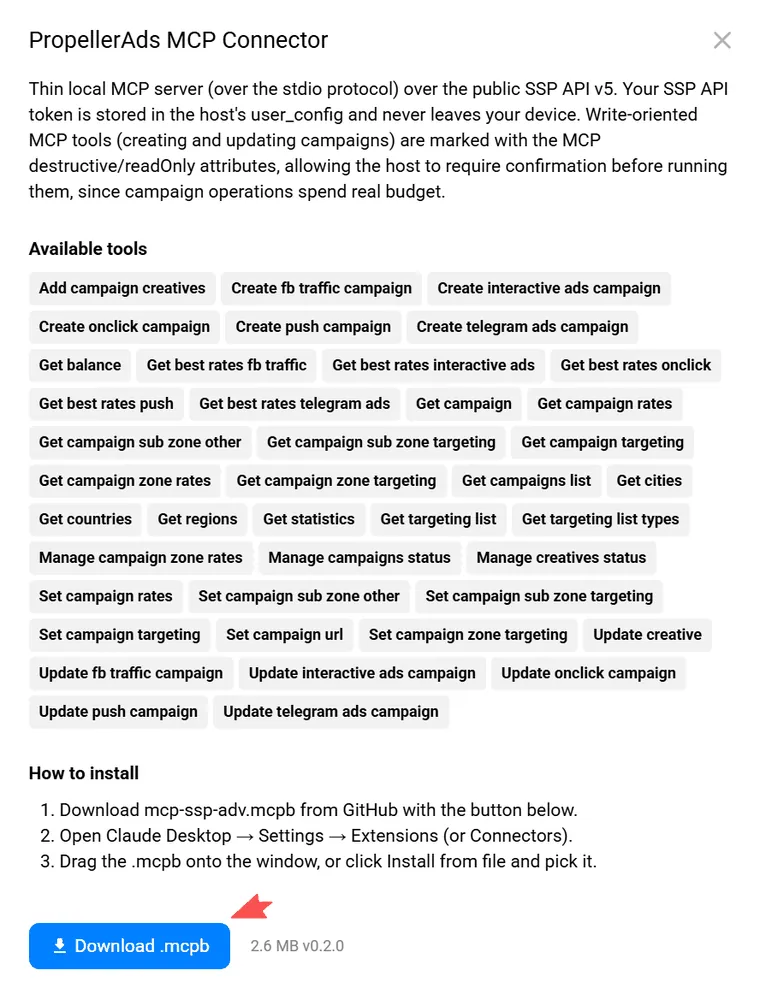
The official connector popup: an overview of the 41 tools, with the .mcpb download button at the bottom
Step 3, install it into your Agent: Settings → Extensions, drag the .mcpb in and fill in three items: accept the advertiser terms (tick the box); paste the token (marked as sensitive, stored only on your machine, the model never sees it in plain text); leave API base URL blank, which defaults to production.
Step 4, restart: restart Agent Desktop so it loads the connector.
Step 5, verify: ask “What’s my PropellerAds balance?” If it reports a number, you’re connected.
Once installed, you get 41 tools.
On the read side: balance, statistics (groupable by 20 dimensions such as campaign / zone / country / hour / device / browser), campaign list and details, bids and bid recommendations, three levels of targeting.
On the write side: create campaigns in 5 formats, change budgets, zone-level bid adjustments, blacklist zones, edit creatives, start and stop campaigns.
Zone-level bidding is the capability I value most: it’s the core move of a whitelist strategy, and from now on it’s done with one sentence.
Safety rules
All write operations carry a destructive flag, and the AI pops up a confirmation before every call.
This is real money, so don’t find it annoying. Read every one carefully before you click. The rule I set for myself: any budget change, bid adjustment, blacklisting or campaign creation needs my explicit personal approval. The AI is not allowed to decide on its own.
03 After a week, the three things I most want to say
Time zone: the trap 100% of newcomers will fall into
PA’s statistics API defaults to EST (US Eastern Time). If you don’t specify, the report you get is in Eastern Time.
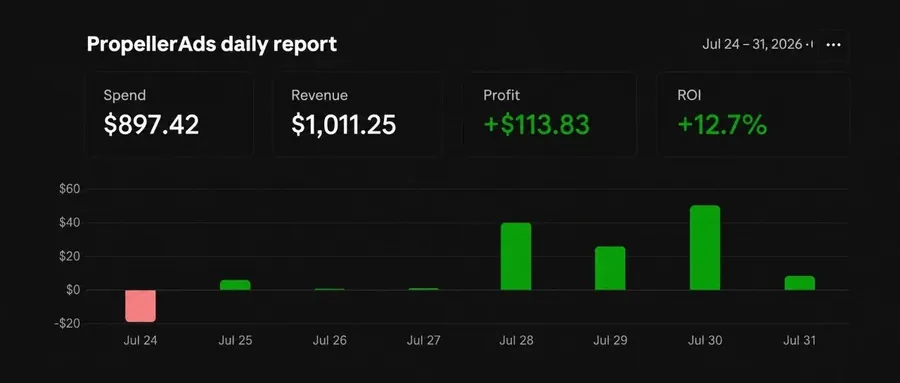
I got burned the first time I pulled data: for the same date range, the EST view showed I made $23 on July 24, when in fact, by UTC+8, I lost $18.9 that day. EST is 13 hours behind UTC+8, so the spending peak of the 24th was split in half and spread across two days, and the bad day was smoothed away.
So when you pull data, add one phrase: in UTC+8.
Don’t aggregate data across days or GEOs
The same zone makes money in TH and loses money in ZA. Lump them together and you get a muddled picture, and you can easily kill a zone by mistake. Check day by day and analyze one GEO at a time.
The last mile of the loop on the media buyer’s side, and the official side has paved the road
I’ve always said full automation is two halves: the platform’s half and the media buyer’s half.
Before, automation on the buyer’s side meant writing your own API integration. Now the interface is standardized as MCP: my monitoring spots a problem, and the Agent executes the pause or bid change directly through MCP. The cron rule for blacklisting zone IDs that I mentioned in the automation section of the optimization guide now has an official channel.
04 The 7 days of numbers after connecting
Talk is cheap.
These are the 7 days of testing after I connected MCP, pulled with a single sentence:
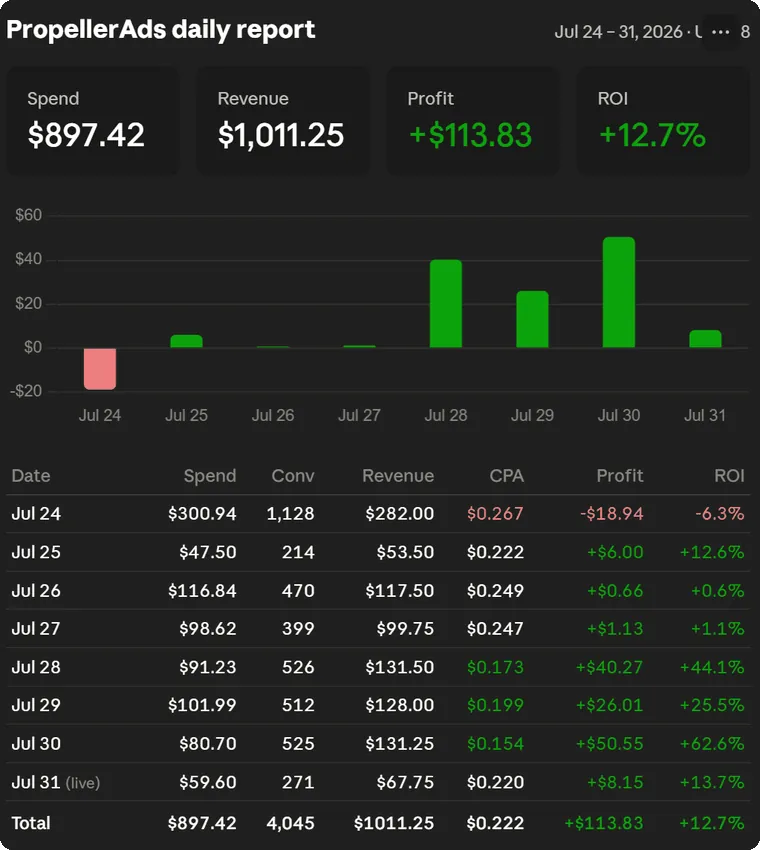
Spend $897.42 / Revenue $1,011.25 / Net profit +$113.83 / ROI +12.7%
05 How to start
Once it’s installed, put it to work right away:
Copy and use
“Show me the last 7 days’ daily P&L in UTC+8, broken down by campaign.”
One sentence to get this week’s numbers straight. I’ve already taken the time zone hit for you, and it’s written straight into the prompt.
At the end of the last post I said: the media buyer’s half, I’ll keep building. Now the official side has handed us the interface. The steering wheel is in our hands.
Direct sign-up: PropellerAds sign-up link
New articles and quick notes from Peter.